Valorant is a complex game. With the various agents and weapons at play, you’ve got a lot to master if you really want to win more games. The first decision you really need to take though is which agent to play. If you’re going to play Valorant as Sage, then you’ll have to think on your feet. Sage is something of a utility to a team as much as she is a player. She is the only healer in Valorant at the moment which has made her abilities a bit overpowered.
Sage has the ability to heal teammates and even bring them back from the dead. This can turn a defeat into a win. On top of this, her abilities can be used in a way that gives your team great mobility. This makes her great as both a support for pushes while attacking and for restoring a team when things aren’t going well. Sage is one of the most useful Valorant agents you can choose to play as. This guide covers everything you need to know to use her abilities as well as you can:
Sage Abilities Guide
Sage’s abilities are really quite diverse. The healing options are great and might make a Sage a must-have agent on your team. However, her other abilities have some interesting tech options too. This is everything you need to know:
Healing Orb
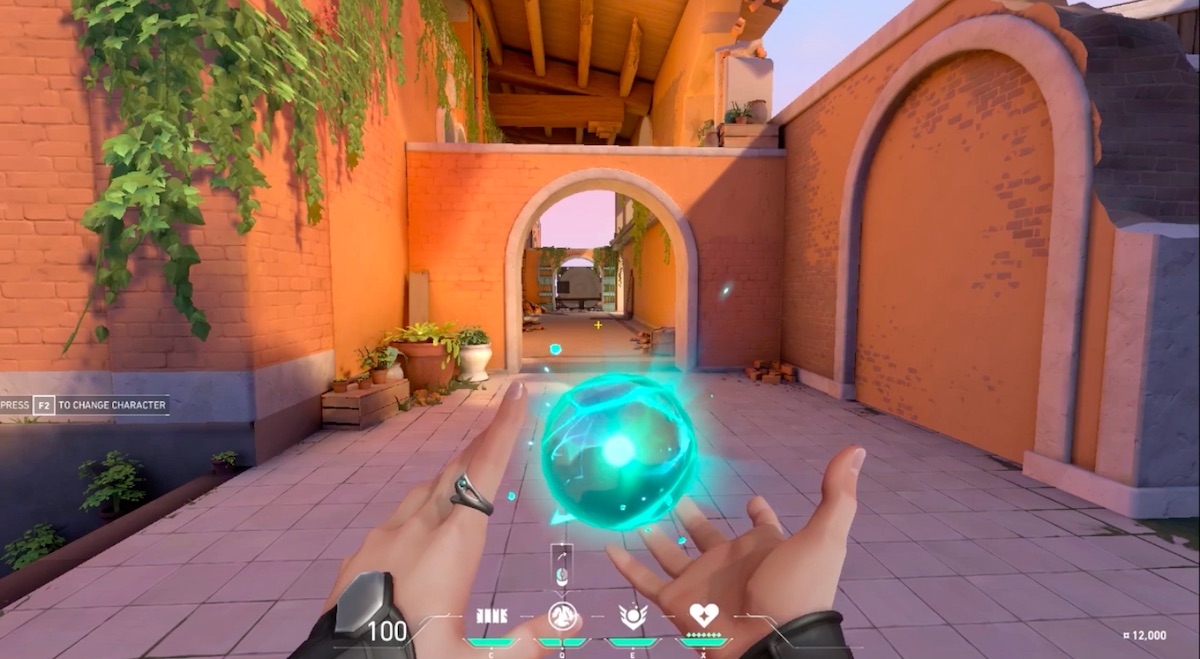
Healing orb is a fairly simple ability. You can use it to gradually restore yourself or a teammate to full health. There aren’t many options for this in-game, so while this sounds basic it is really useful. These are some things to keep in mind when playing as Sage:
- This is on a 36-second cooldown, so very quick. You can get a lot of these used in rounds.
- This is really well used in the pistol round. A quick heal can allow your teammates to continue rushing all other players. Since the pistol round is essentially a level playing field, this should let you brute your force your way past other players. This should get the ball rolling for buying better gear as rounds continue.
- You can mouse over others to see their health if your teammates aren’t communicating as well as they should be.
- Try to keep Sage alive to use this a lot.
- Keep Sage in the middle of the group, close enough to heal everyone but not so close that she’s the easiest target.
Slow Orb
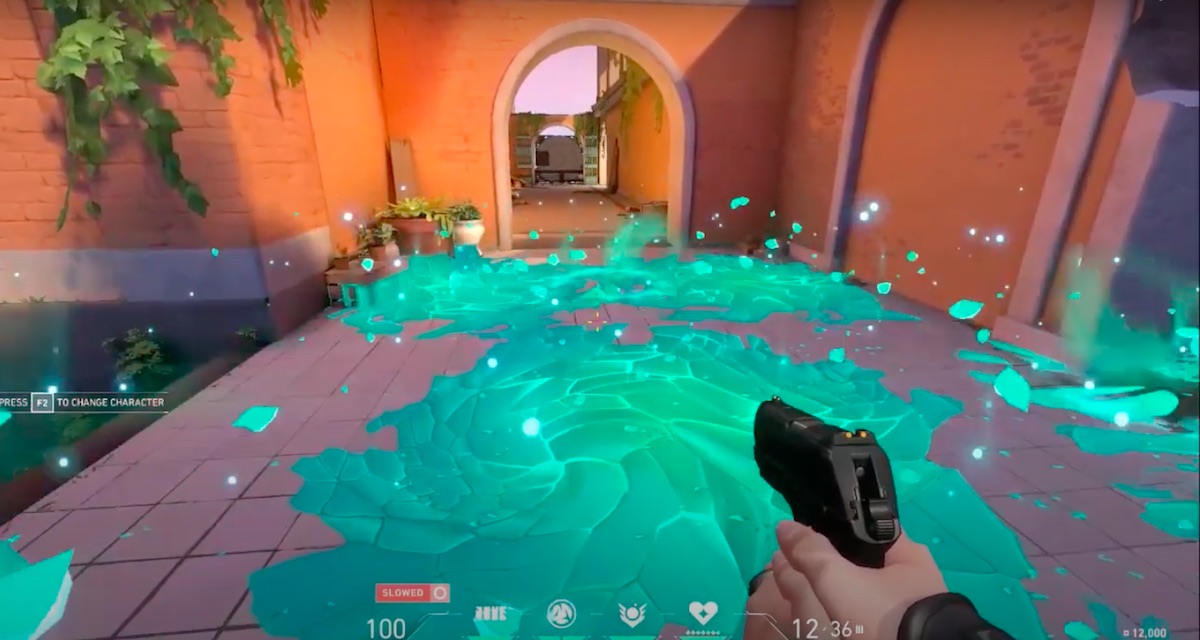
This is a projectile that shatters on impact with the ground and spreads a slowing ice. This has two main benefits for you, the first is actually slowing anyone who enters it, and the other is the audio cue of it being walked on. This is how you should use it:
- This affects your teammates and yourself too, so think through your placement with this.
- The audio cue from its use can be just as important as the actual slowing effect. Use it to guard your flanks, you’ll know of an incoming attack because of the audio cue.
- This can be used to great effect when you’re being rushed. Just through it into the line of attacking enemies and it should be enough to halt things, even with some abilities being used on the other side.
- Use it to protect an area around planting the bomb.
- Don’t confuse this and the healing, it looks pretty much the same.
- This is a lot more useful when defending than attacking.
- It can bounce off of walls, so you can use it without having to peak as well.
- This is a great barrier for map control.
Barrier Orb
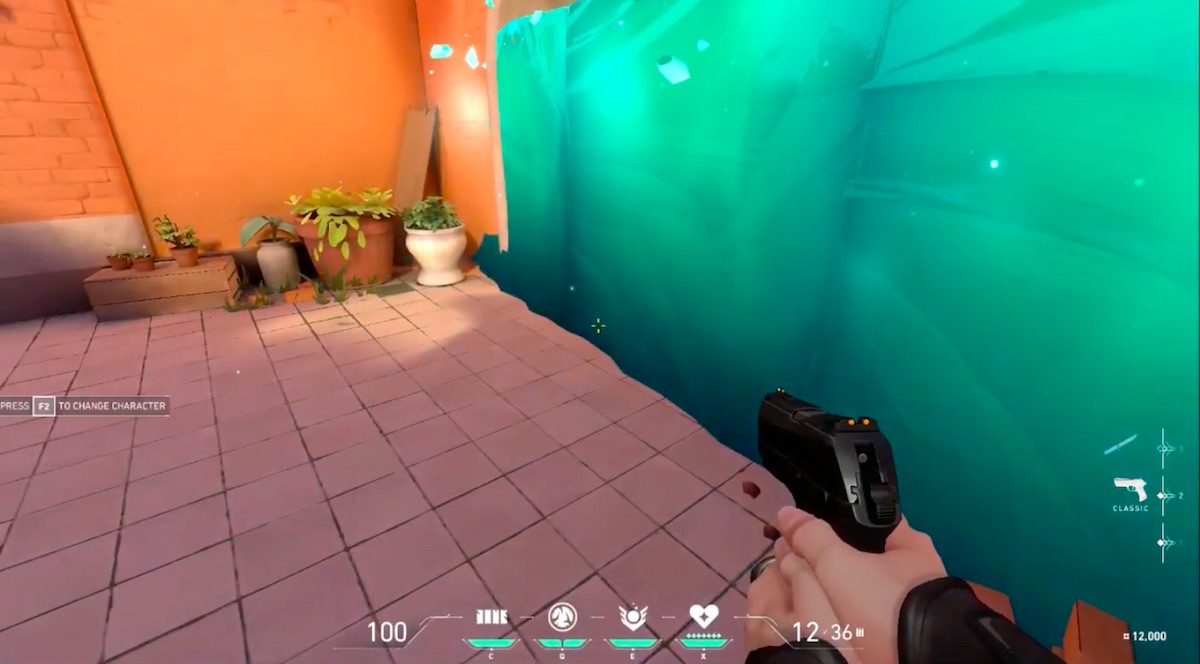
Barrier orb is one of the most interesting from Sage. It is a wall that you can throw up to block off a line of sight and space. However, where it gets really interesting is the movement options it opens up. This is what you need to know:
- This can be even better than a smoke barrier since it is completely impassable.
- It can be used to cut into a rush down from enemies, secure a bomb site, or block off a flank.
- When combined with other zoning attacks, you might be able to set up something of a safe zone for a short amount of time.
- Wall boosting can work really well. This is a common tactic for movement. If a player is stood on a wall, it raises them upwards.
- You can use this with a teammate or just yourself to rise above the normal level of play.
- From up here, you can peak from an unexpected angle or make sure you’re in an adventurous high ground position.
- A lot of players try to use the wall just for wall boosting, since the new angle on gameplay can be really useful.
- This is an ability you should be trying to buy a lot.
Resurrection
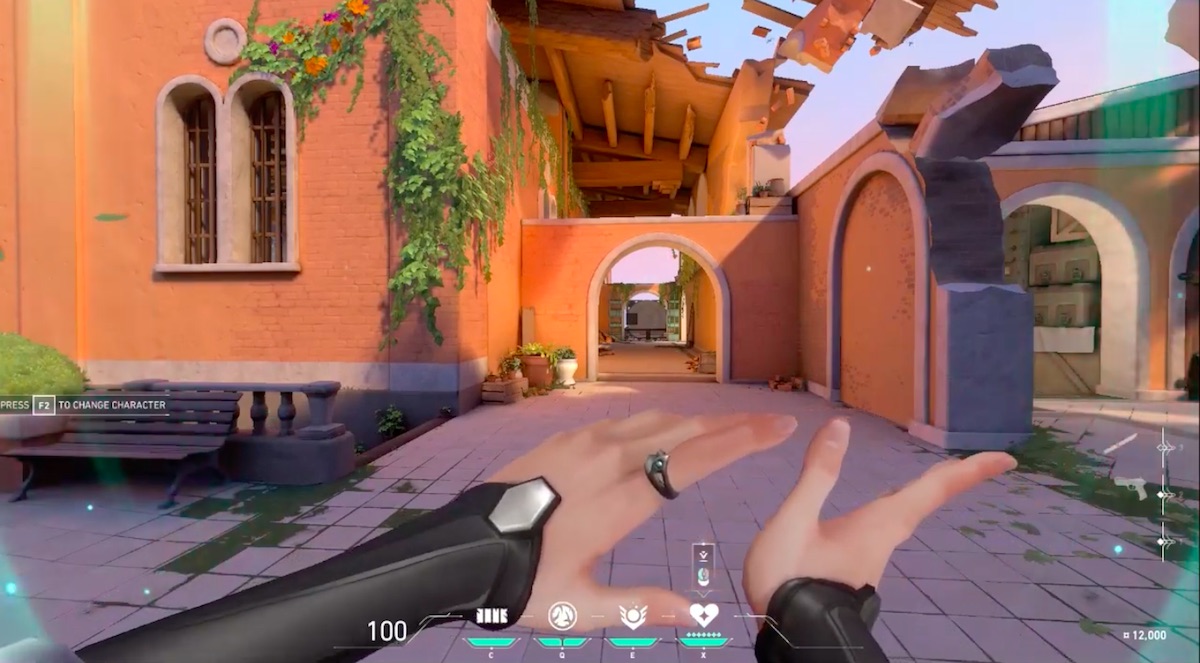
This Ultimate is pretty good. You can revive another player. The applications of this should be pretty explanatory really, but these are some tips to really get the most out of it:
- Go for the easy revive. This is a fairly overpowered ability and you want to make sure you can actually do it. Aim to revive someone who is quite close by, one more player is always a big improvement so this is the safest way to play with it.
- Don’t use this in an open vulnerable space. After using it you and your teammate are going to be exposed. This means bad placement might cost you two players instead of one.
- If possible, save a wall to throw up to provide cover immediately after and during the revival. This makes it a lot less risky to use.
- Use it quickly. The exact right moment to use it isn’t going to come just when you need it too. Just use it, and don’t stress too much about getting ‘all possible value’ out of it. It is better to have one more team member for that round and start recharging another use.
Who Should Play as Sage?
Sage is best used by players who are keen to use different strategies each time around. With such diverse abilities, a Sage player is going to be one of the most important parts of the team. However, they will also need to be able to think on their feet and try different tactics out.
Our other Valorant guides can help you get the most out of the game’s core mechanics, no matter which agent you play as:
- Valorant Economy Guide
- Valorant Tips and Tricks
- Brimstone Valorant Guide – Tips and Tricks
- Valorant Cypher Guide